Cooling It Further


Home | Windows Tweaking Guides | Games Tweaking Guides | NVIDIA Tweaking Guides | Audio Tweaking Guides | Computer Jargons | PC Building Guide | Tech News | BIOS Tweaking Part I | BIOS Tweaking Part II | Case Mod And Cooling | Reviews | Things To Do | Misc. Stuff | PC Protection and Maintenance | Troubleshooting Guide | Rants | Help Push | Pushy's System Specs | Top Downloads | FAQ's & STC's | What's New? | Sign my Guestbook | Links


For months I've been wanting to purchase a badass Thermaltake Shark casing to help make my system look (and literally) cooler. Only problem is, the darn thing is pretty expensive. Now I thought to myself since I already have some of the things necessary for "cooling" a system down, I decided to further modify my system instead. When I started, I have 3 things in my mind. First priority is better and more effective air circulation (since my games were locking-up after few minutes of play). Second is to save money. And lastly is to enhance its aesthetic appearance.
 
And the result is pretty nice IMO ....


Well I am not going to discuss the things I did to make this case look the way it is. I will leave that to your artistic skills. If you have already read my original Case Modding section, then it will be really easy for u guys to follow and understand this one. And if u haven't read it yet, I suggest that u do before proceeding with this article. However to give u guys an idea on how I modified my case, here's a quick description. I purchased 1 can of metallic black (main base color) and silver (w/ the glitter effect ... forgot the exact type ... for the side stripe) paint. Plus a can of acrylic for that glossy look and to protect the paint from fading. The fans on the other hand works 2 ways, to cool my system down and the led's are for the "cool" factor.  I will be adding 5 additional badge stickers in front of my system to kinda advertise what's "inside" the box. Now since I have very limited time updating my site I will no longer update the pics here to show u guys what it looks like since this section is for cooling purposes. If u want to see how it looks like it will be posted in my personal website.

 
Now the only thing that changed on the outside beside the paint is the right air exhaust. Its no longer sealed to let cool air go in to help cool down my expansion cards. The additional (shoe like) air soles on the lower and upper left is for additional cool air intake (lower grill) for my expansion cards and hot air exhaust (upper grill) that is mostly generated by the PSU.
 
The said minor modifications may not sound like a big deal. But add the few minor adjustments I made inside enhanced their effectiveness ...


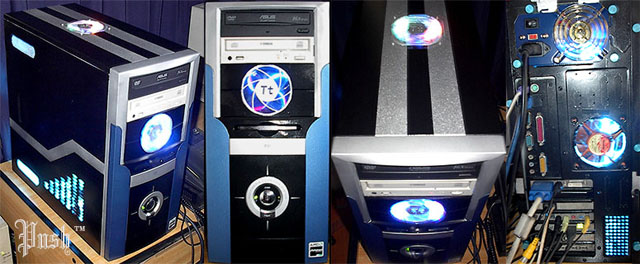
Now first thing u should ignore is the cathode light since it obviously doesn't have anything to do with cooling/ventilation. Now I believe I failed to mention that I was using a positive cooling system before. I decided to switch to negative since I now have 4 expansion cards in my system and heat is not released fast enough to prevent them from generating too much heat and cause stability problems.
 
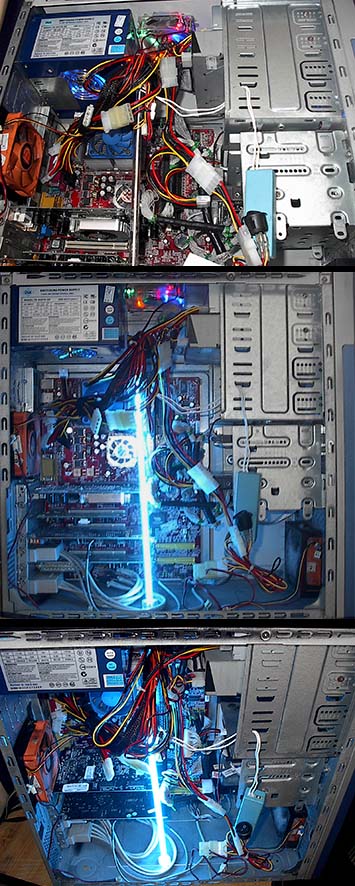
Given that, my high CFM Thermaltake which used to be located on the mid-front is now located at the back. That badass fan is responsible for sucking all the hot air out from my expansion cards, and at the same time suck air from my right side panel air grill. So not only does it suck hot air out, but suck cool air in. Now because of its high CFM, cool air coming in from the lower intake grills will go up to the expansion cards to cool them down and immediately gets sucked out the case by the fan even before its temp rises up. And oh, did I mention since the fan is sitting right next to the processor it helps cool it down as well? Pretty nice stuff huh?! I also used the RPM knob switch for this fan so I can lessen the noise by lowering the speed when its raining outside ;)
 
Now if u look up the case, I have added an exhaust fan which helps release the heat coming out from the PSU and optical drives. Now since I have an intake fan in front of my case, I only purchased a low CFM fan for my top exhaust. Adding a high CFM fan on top will render my front intake fan useless since it will just suck out the cool air immediately even before reaching my processor. The top exhaust fan is just meant to suck some of the trapped hot air in my case since my PSU is not equipped with a powerful fan and the heat coming out of it is pretty alarming especially during the afternoon ... so it needs a bit of help ... and that's why I now have a top exhaust fan.
 
Now my high CFM fan that is used to be located in front of my case was replaced by a low CFM fan. Having a high CFM should further help my case run cooler because its going to suck cool air in and push hot air out to my rear exhaust fan. Problem is, I cannot find a quadled high CFM fan.
 
Now the only main stay in this picture is my Thermaltake intake fan on the lower front. Its job is to force cool air into my case since the grills will obviously not cut it. This one is set to run on full speed 100% of the time.
 
If u guys noticed the cables are better arranged this time around. The center portion of my case is pretty much free from cables which also helps cool my system even further.
 
If u guys do not have a clear side panel then adding a cardboard to direct air coming in from the lower intake fan upwards in the direction of the expansion cards is a good idea. That will also prevent cool air from going straight out of the case via the side panel air grills. Positioning one in between the upper exhaust grill and rear fan is also a good idea since that will prevent mis-circulation of air (cool air getting sucked inside the case rather than hot air naturally going out due to fan).
 
The overall result of this experiment of mine made the air coming out of my rear fan contain almost zero trace of heat even on hot afternoon's and/or after playing games. Compared to nerve whacking hot even right after just a couple of minutes of using the computer before.


**August 17 Update: I have purchased a new PSU w/c caused this section a minor update. The PSU hosts a dual fan with automatic speed control. Its a pretty neat idea but for a guy like myself who lives in a tropical country, having an auto-fan speed control PSU just basically means that it will run at low speed during the first 10mins, and run at max after that. It may prove to be a bit helpful however on the rainy days to minimize fan noise and save a bit of electricity. The new PSU is also equipped with twice the number of chords when compared to my previous PSU. That is good news because I'm currently set in purchasing some more parts for my system, but it has caused a bit more clutter on the upper-mid portion of my tower ... not a real biggie though.
 
Other than the small effect on my system cooling, the new PSU has pumped the "looks" factor up a bit mainly due to its crystal blue led (with gold plated grill) fan. Combine that with the metallic blue casing, it has perfectly matched the theme of my modded case. Now my case not only glow at the front and left side panel ... but also at the rear (as seen on the second pic above)

<< Case Mod and Cooling

 
Last Updated: 081005
=Closed to Future Updates=


IMPORTANT:

***I will not be held responsible to any damage this tweaking guide might cause your system.

**What do you think about my Case Mod and Cooling guide? Please sign my guestbook before leaving, it's the least you can do to thank me, and the only way for me to know that someone did visit my site!

**Any errors/corrections, comments, and/or additions to my Case Mod and Cooling guide are welcome and will be greatly appreciated

*Contact me if u have any comments and/or suggestions. Tnx!